Tormod Landet

Articles tagged with Code

  1. Creating a mesh in FEniCS

    I may end up doing a large project using FEniCS which is a collection of tools for automated, efficient solution of differential equations using the finite element method. While playing with implementing a simple solver for fluid flow in a tank by use of FEniCS to solve the Laplace equation I needed to create my own mesh in code.

    FEniCS is quite well documented, but I had to look at the source code for some of the mesh conversion routines to find out how to build a mesh from scratch. So, for posterity, here is a reimplementation of dolfin.RectangleMesh in a much more cumbersome (and flexible) way:

    import numpy
    import dolfin as df
    
    def create_mesh(length, height, nx, ny, show=False):
        """
        Make a square mesh manually
    
        Should give exactly the same results as using the built in dolfin.RectangleMesh() class
        """
        # The number of mesh entities
        nvert = nx*ny
        ncell = 2*(nx-1)*(ny-1)
    
        # Positions of the vertices
        xpos = numpy.linspace(0, length, nx)
        ypos = numpy.linspace(0, height, ny)
    
        # Create the mesh and open for editing
        mesh = df.Mesh()
        editor = df.MeshEditor()
        editor.open(mesh, 2, 2)
    
        # Add the vertices (nodes)
        editor.init_vertices(nvert)
        i_vert = 0
        for x in xpos:
            for y in ypos:
                editor.add_vertex(i_vert, x, y)
                i_vert += 1
    
        # Add the cells (triangular elements)
        # Loop over the vertices and build two cells for each square
        # where the selected vertex is in the lower left corner
        editor.init_cells(ncell)
        i_cell = 0
        for ix in xrange(nx-1):
            for iy in xrange(ny-1):
                # Upper left triangle in this square
                i_vert0 = ix*ny + iy
                i_vert1 = ix*ny + iy+1
                i_vert2 = (ix+1)*ny + iy + 1
                editor.add_cell(i_cell, i_vert0, i_vert1, i_vert2)
                i_cell += 1
    
                # Lower right triangle in this square
                i_vert0 = ix*ny + iy
                i_vert1 = (ix+1)*ny + iy+1
                i_vert2 = (ix+1)*ny + iy
                editor.add_cell(i_cell, i_vert0, i_vert1, i_vert2)
                i_cell += 1
    
        # Close the mesh for editing
        editor.close()
        print 'Created mesh with %d vertices and %d cells' % (nvert, ncell)
    
        if show:
            df.plot(mesh)
            df.interactive()
    
        return mesh
    

    If anyone finds this by searching the web for how to build a mesh programmatically in FEniCS/dolfin, then I hope the above was understandable. The documentation is quite good when you know that you need to search for the MeshEditor class ...
  2. Sorting images

    Once upon a time, back when I was using Windows at home, I had a useful small program that helped me sort through new pictures from my camera. I have forgotten the name of the program, but basically it allowed me to sort the good pictures from the bad in a fast and efficient manner so that the really bad ones could be deleted and the good ones could be separated, maybe for sharing with others.

    I have just been on a trip where I took quite some pictures. I could have gone over the pictures and manually copied the good ones into a separate folder for sharing with friends. This would have been a bit boring, but it would only have taken about five minutes. As a programmer I of course selected to optimize this task and spent some hours recreating the program I had once used. After a thousand trips or so I will come out ahead in terms of time spent!

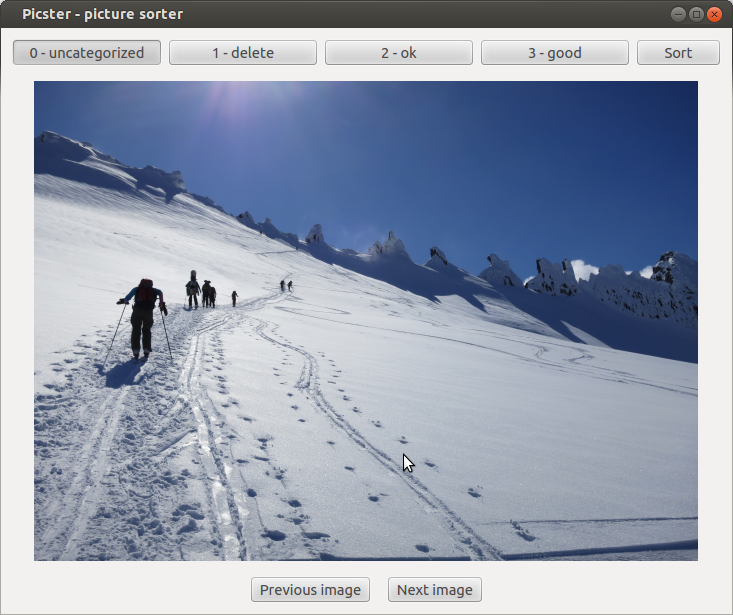
    The program looks like this:

    Picster GUI

    I named it Picster, short for Picture Sorter. There is, of course, at least one other programs with that name already, but I cannot be bothered to find something better at the moment, It's just a script, after all. It is meant to be used from the keyboard, but there are also buttons for all possible actions (moving between images, categorizing images, and sorting images on disk based on category information).

    All of the GUI coding I do at work is scientific visualization, mostly using Python 2 and the wx library in some way. To try something slightly different I went with Python 3 and Qt for this program. I cannot really call myself an expert in Qt after only a couple of hours and the Picster code is probably not how a Qt expert would have written it, but it seems to work OK.

    From this brief encounter, Python Qt code seems to be a bit more verbose and tedious compared to wxPython. For example Qt/PySide is missing the nice init arguments, so all properties on an object must be set after creation through method calls. The API is not very pythonic with no use of Python properties as far as I understood. I am also missing docstring help on class and method name completion in Eclipse PyDev :-(

    Also missing as far as I understood is the wxPython ability to bind to any event from anywhere. To listen for keystrokes or window size change for example you must override virtual methods. For now I am happy with using wx at work. The Qt documentation that was rumored to be fabulous seems quite on the same level of the wx documentation as well.

    What I really liked about Qt was the Layouts which work almost exactly like Sizers in wx, except that they come with a sensible default spacing of widgets. This is a sore spot in laying out wx interfaces and always needs manual intervention to look good.

    Enough mostly unqualified statements about Qt vs. wx, here's the code for anyone interested in a picture sorting program. The code requires Python (probably works in versions 2 and 3, tested in 3.2) and PySide for Python bindings to Qt.

  3. Full screen music info

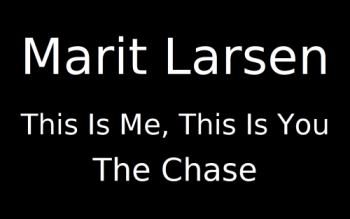
    I've written a short program to show the currently playing song in a full screen view to avoid having to walk over to the computer when I want to know what the current song is called. The Squeezebox has mostly made this obsolete as I now just look at the screen on the hand held Squeezebox Controller, but it's still nice to have once in a while so I decided to put it up for you to play with if you find it useful. it looks like this in full screen mode:

    Marit Larsen - This Is Me, This Is You - The Chase

    Marit Larsen - This Is Me, This Is You - The Chase

    Supported programs are Amarok (pre KDE4/QT4), Spotify and SqueezeCenter. You probably need to run some sort of Unix OS, at least for the Amarok support to work (it uses dcop from the command line).

    The program with a short description can be found here: full screen music info.

« Page 2 / 2